Description:
This application is not a wallet. It is to simplify the mining of CITU cryptocurrency in a user-friendly environment. It includes the ability to create a cryptocurrency address, blockchain statistics, staking, and mining with settings. The application works in the JAVA environment, therefore it is necessary to download JAVA to the PC first .
All application setup data as well as the blockchain will be downloaded and stored in the "resources" folder on the C drive. You can place the application in any folder you want. The downloaded wallet will also be stored in this folder (every time the application is restarted, it checks the latest version of the wallet on github, and if the existing wallet in the folder with the application is older, a new one is automatically downloaded and launched).
STEP 1
Download and install the original JAVA environment for Windows: https://download.oracle.com/java/23/latest/jdk-23_windows-x64_bin.exe
Note : the app requires minimum version 17: https://jdk.java.net/archive/
STEP 2
Download and run the app: https://github.com/SuprTrupr/CITU_app_miner/releases
When the application starts, it checks if there is JAVA. If not, it won't work. If JAVA is fine, wait until everything necessary starts (usually it takes a few seconds or up to a minute).
When the lower console says: "Started UnitedStatesApplication in xx.xxx seconds….", then go to the next step.
STEP 3
If you have already created a wallet address, you can skip this step.
Create an address for your CITU coins here by clicking "generate new account".
This will generate your wallet address and password. Keep the data safe or click on "create backup file" - a TXT file with the name of your wallet address will be created for you in the folder where the app is located
Example :
Public Key = your generated wallet address
Private Key = your password for handling your wallet
STEP 4
Now we will set up the wallet and server for mining.
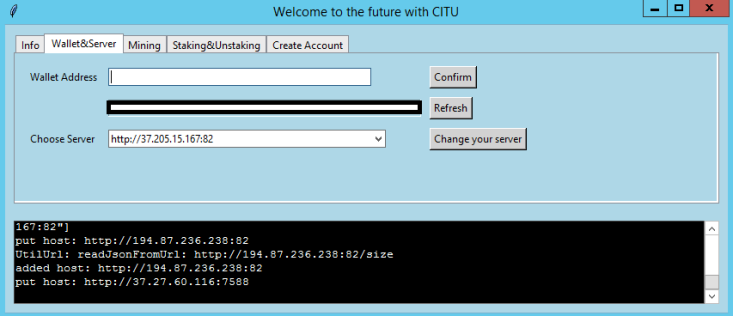
Paste the generated address in the previous step into "wallet address" and click "confirm". The address will be saved and you can click "refresh" to display it.
You can select the server you want to mine on in the "choose server" box and confirm your choice by clicking "change your server"
Note : primarily, the default CITU main server is automatic set.
STEP 5
The previous step is followed by the start of mining.
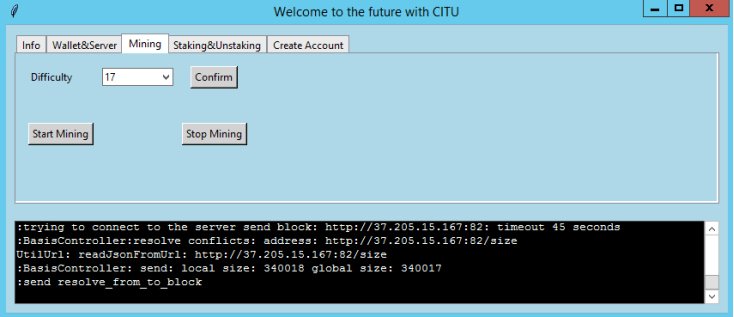
First, set the mining difficulty according to your CPU performance. The default is 17, but that's for older, weak CPUs.
A 19-21 diff is commonly used on today's CPUs. If you have many threads, you can try 22-24.
The "start" and "stop" buttons turn mining on and off.
Note : If you are using the application for the first time, you do not have the blockchain downloaded, and after starting mining, the blockchain will first start downloading to the "resources" folder, as mentioned at the beginning of this tutorial (which will take a few hours), and only then will mining start.
This is the status of a successful mining run :
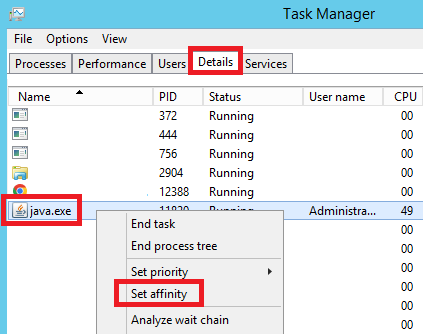
Note : You can limit the number of threads involved in mining in the "task manager" (start it with the keys ctrl+alt+del), as follows:
STEP 6
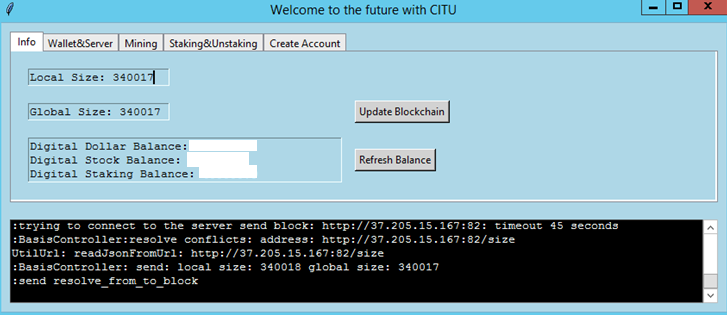
You can find informations about the number of blocks and the balance of your wallet in the "info" column of our application.
LOCAL SIZE = number of current blocks on your disk
GLOBAL SIZE = number of current blocks on the CITU main server
DIGITAL DOLLAR = number of available coins in your wallet
DIGITAL STOCK = the total number of "stocks" you own
DIGITAL STAKING = number of coins in staking
Note : You can learn the meaning of "staking" on our official Discord server: https://discord.gg/qDqFzvEZ2Y in the section: https://discord.com/channels/1114144782575468575/1258150799297744948/1259765122478637107
Click the "update blockchain" button to manually download/update the blockchain on your disk.
Click the "refresh balance" button to view/update your wallet's current coins balance.
STEP 7
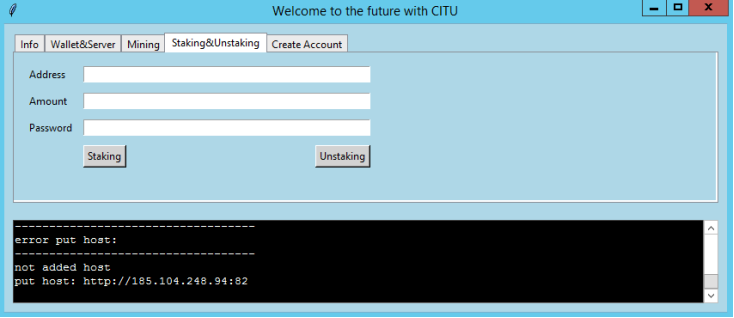
Setting up staking is done here:
ADDRESS = enter your wallet address here
AMOUNT = the number of coins you want to transfer to staking or back to the wallet
PASSWORD = is your private wallet key generated in step 3
Then click "staking" if you want to transfer the coins to the main server for staking or "unstaking" if you want to transfer them back to your wallet.
STEP 8
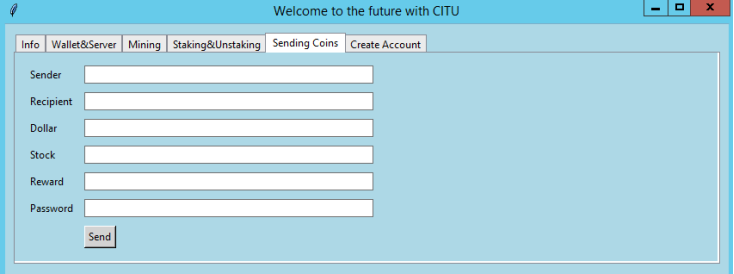
In this step, we will show you how to send coins to other wallet addresses.
SENDER = enter your wallet address here
RECIPIENT = the address where you want to send your coins
DOLLAR = the number of coins in your wallet that you want to send
STOCK = this is for the future, enter 0.0 for now
REWARD = this field must always contain 0.0
PASSWORD = enter your private key generated in step 3 here
Note : Enter 0.0 in the "stock" and "reward" boxes - if you enter 0, it won't work!